- RISCOS
Using VoiceCon
Installing VoiceCon
To install VoiceCon, simply copy it from the archive to your hard disc drive.
Running VoiceCon
If you double-click on !VoiceCon on your hard drive, you will see a small window appearing on the bottom right of the screen (just above the icon bar), and an icon on the right hand side of the icon bar.
The small window looks like :
![]()
This is the VoiceCon main window. It is split into two main sections - the left hand side shows the current sentence; the right hand side contains the icons.
The icons, from left are:
- Sentence hide icon (looks like a grey rectangle with a blue triangle). If you click this icon, the current sentence part of the window toggles from displayed state to hidden state and vice-versa.
- Active icon (looks like a red microphone). If this icon is selected (darker grey background), then VoiceCon is activate; if it is not selected (light grey background), then it is not active.
- Training icon (looks like a teacher). If this is selected, then the training mode is selected; if it is not selected, then training mode is not seelected.
- Options icon (looks like a question-mark). If this is selected, then the options mode is selected; if it is not selected, then options mode is not selected.
- Close icon (looks like a window's close icon). If this is clicked on, then VoiceCon closes down.
Calibrating VoiceCon
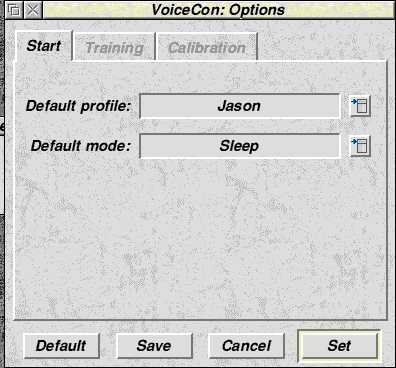
Before you can use VoiceCon, you will need to calibrate the software with your sampler. To do this, click on the Options icon, which will cause the following window to appear:

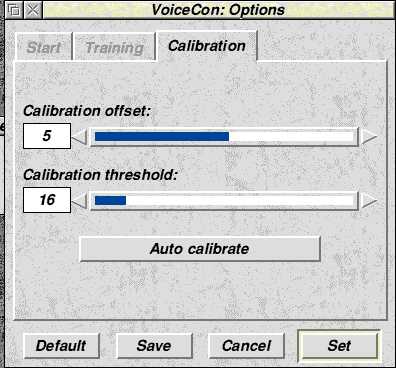
Clicking on the "Calibrate" tab will change the display to:

Although it is possible to calibrate VoiceCon manually, it is far easier to use the automatic calibration system. Turn the microphone off, and click on "Auto calibrate". You will be prompted to turn your microphone off, and then click on "Continue". After a brief pause, turn the microphone back on - do not say anything at this point - and click on "Continue". After another brief pause, click on "Continue" again. You have now calibrated the software.
The calibration settings are the offset (or sampler bias - a perfect sampler will have a bias of 0; values between -16 and +16 are good. If your sampler has a bias of over +/- 32, then contact the sampler supplier), and threshold (how much background noise there is). If your threshold is less than 12, then it may be worth setting it to 12, as your breathing may be picked up as a word! Now you have calibrated the sampler, click on "Save" to save the settings, and then "Set" to set it for this session.
Training VoiceCon
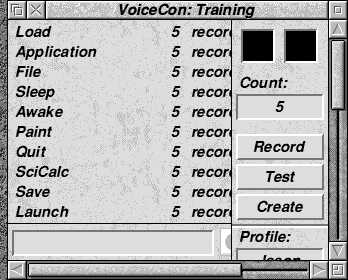
After calibration, VoiceCon needs to be trained to recognise your voice. To do this, you will have to enter training mode. Click on the training icon (on the VoiceCon main window). This will produce the following window:

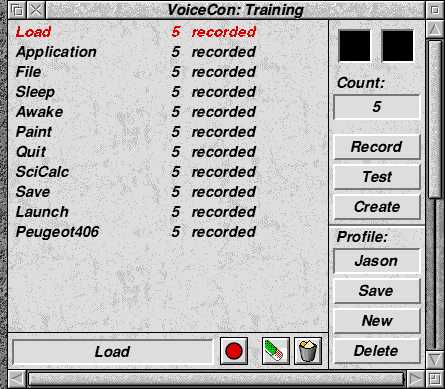
This window is the Training window. If you open the window more, it will look like:

It is split into three main parts:
- The right hand side is the profile and word creation part of the window. The top part of this window is used for testing and creating words; the bottom part is for creating, saving and deleting profiles.
- The bottom of the window holds the word record, word erase and word delete icons.
- The top left part shows the words that have been stored by VoiceCon and how many different versions of the words there are. If a word has been created, but no words recorded, then it will show that there have been no versions recorded of that word.
Creating a profile
VoiceCon allows you to create a number of user profiles, each one for a different person. Before you record any words, you will have to create a new profile.
Click on the "New" icon in the profile section. This will produce a small window where you can enter your profile name. This can be up to 10 characters in length.
When this is done, you may want to select this profile as the default profile to use - close the training window, and open the options window. Press MENU on the "Default profile" menu button, and select your profile. Click on "Save" and "Set" to set the default, and close the options window.
Recording a word
To record a word, select the first word (it will be highlighted in red), and click SELECT on the record icon (looks like a red circle at the bottom). A window will appear, which will say "Waiting for input...". Say the word that is selected, and the input will change to "Recording input...". When you have finished the word, it will change to "Recorded input" for about half a second before it disappears.
You may also see that the number of times the word has been recorded has changed to 1.
In order to improve the accuracy, it is worth recording different versions of the same word. Click on the record icon again to record another version. You may want to change the position of the microphone at this point, so that you do not need to keep the microphone in a similar position in order for VoiceCon to recognise the word.
When you have done this 5 times, there is a short-cut you can use for automatic recording.
Select the second word, and click ADJUST on the record icon. The record window will appear, but it will say "Waiting for input 5...". This will count-down for each recording. When all 5 recordings have been made, the next word is highlighted, and you can record this word now.
If you decide to have a break (and it is advisable to do this every so often), simply close the sampling window.
If you make a mistake
If you accidentally make a mistake (such as saying the wrong word, or coughing!), then you can erase all versions of a word. Select the word, and click on the "Erase" icon (which looks like the eraser at the end of a pencil). You will be prompted if you wish to do this - click on "Erase" if you are.
You will then be able to record new samples.
Note: You can erase more than one word by selecting all the words you wish to erase.
Adding to the samples
If you find a word is getting confused with another word, then it may be worth recording more versions of the words in question - you can record up to 16 samples per word - click on the record icon, either using SELECT for one more version, or ADJUST for automatic.
Deleting words
If you want to delete a word, select it in the same way that you would erase it, and click on the delete icon (looks like a dustbin). Like the erase, you will be prompted if you wish to delete it. Also like the erase, you can delete more than one word by selecting the words you wish to delete.
You should only need to delete a word if you do not need it any more. In version 0.03, the words "Load", "Application" and "File" are essential.
Saving the profile
When you have finished editing your profile, or if you want to make a current backup of your profile, click on "Save". This will save the current words in your profile.
Testing
If you want to test what you have recorded, then click on the "Test" icon. This will produce the same sampling window, but when you say your word, a list of the top 20 words will be displayed, with your word (hopefully!) at the top. Each word is allocated a score. The lower the score, the better VoiceCon matched your recorded word with the taught words.
If you close the training window, this window will also be closed.
Finishing off
Once you have trained VoiceCon with the few basic words, you can use VoiceCon with the VoiceCon helper which can load applications and files, and also "press" keys at your voice commands.
