- Mechanical
- Steel
STLCutter 2 - Day 10
The last day
I arrived at the workshop, and set the computer up. I got the printer port cable that Keith had, and did some tests on it. It wasn't a printer port extension cable, it was a null-modem cable, so not all the pins were connected, and some were swapped. Absolutely useles!
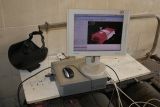
So a quick trip into Maidstone, and I picked up a 3m long cable which had all 25 pins connected in a 1:1 arrangement. This worked perfectly - this is what the display looks like:
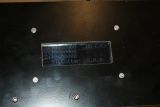
The computer worked fine.
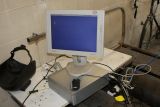
It shows the X, Y and Z position (in steps), and whether the charge-pump is working (top right corner - "NO LOCK" means the charge-pump is not present, and "Locked" is shown when it is).
Unfortunately, EMC2's stepper configuration doesn't enable the charge-pump, so I had to reprogram the PIC so it didn't require it to be present.
I did some tests, and got it moving - its top speed (X and Y) is 300mm/s, or 18m/min, which is faster than I was expecting. I think it can go faster still, but EMC2 didn't want to go faster. The acceleration I've configured it to be 1500mm/s², which is pretty good. I did some tests for torque (plenty of it), and the Z axis maximum speed was set to 200mm/s (which would mean that 1000m/s may be possible on the X and Y axes).
With it configured, I ran the example EMC2 program (without the router bit fitted, so just going through the motions). It worked very nicely in multiple directions!
I then fitted the milling tool (it's designed to cut water trenches in PVC), and wired up the router to the mains (it will go through a relay later on) - and loaded the program.
I had a partially cut block from the first version of the machine which I used for a test - unfortunately, the Z-axis skipped a bit, so I aborted the run, and set the speed to 150mm/s. I had also not propped the block, and the router pushed it.
I then got a new block, and started it milling.
The software starts off doing very fast runs cutting every 4mm (rough-cut), so the maximum cutting depth (configured to 35mm) is never exceeded.
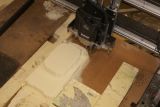
This had just finished the rough-cut, but the Y-axis went a little wrong. I think the cutter hit one of the fence blocks of foam with the portion of the shaft that isn't cutting (i.e. it was trying to cut beyond its cutting depth). Also, the Y-axis is the one which I'd fitted tape to get the coupling to fit, so it could've slipped on that too. * See note at bottom.
Since I wasn't really looking for a perfect model, I left it as it was - I was more looking to see what kind of finish it would have.
There was also a programming error which caused the tool to cut through the body at the back (it should've gone over it). An easy one to solve.
This is just starting the roof - the rear has been done:
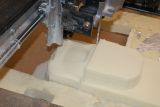
EMC2 shows the current work done:
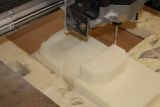
And after doing most of the roof (just starting the windscreen):
An overview of the whole machine:
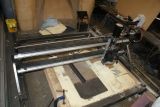
You can just see the LCD display towards the top-middle - I'd accidentally forgotten that the cable came out the bottom, and so the panel needed to be raised.
And doing the front:
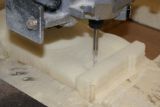
The final problem it faced was that the MDF board sags in the middle a bit, and it started routing into it. It ended up at a depth that was too deep for it to cut, and since I hadn't inserted the tool all the way in, it pushed it out.
I measured the temperatures of the motors and things - the Z-axis motor was the hottest at 52°C, the Y-axis was the second hottest at 40°C, and the X-axis was at 30°C. This is understandable, because the X-axis did not move that much, and the Z-axis needs to be moved 5 times as far for the same distance.
The router was 27°C, and the 110V inverter (which I was worried about) ran fine, at 37°C. In fact, I'd forgotten that it was meant to be used intermittently until about half-way during the run.
So, that was it - the first mill using STLCutter 2:
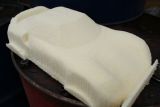
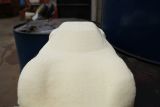
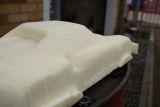
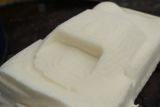
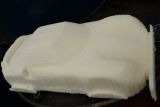
The first STLCutter took about 4½ hours to run, and this took about 2 - so it is faster, but still not as fast as I would like. I've also thought of a slight variation to the algorithm to reduce the steppiness - this will be detailed later on...
* Note for the slipped Y-axis
While refactoring the code that generated the G-code, I found that the problem was actually in the G-code, and there was no slippage. The rough-cut code knew about a 10mm X/Z offset that I'd programmed in, whilst the smooth cut didn't know about it - as a result, it was 10mm off in both the X and Y axes.
I hadn't noticed the X-axis "slip" because the Y-axis was much more pronounced.
When the code's finished being refactored, I'll re-run it with a corrected form of the G-code - it should be much better!
